Plan of Correction
The Plan of Correction page will show you a listing of completed audits with their associated plan of correction.
Navigation
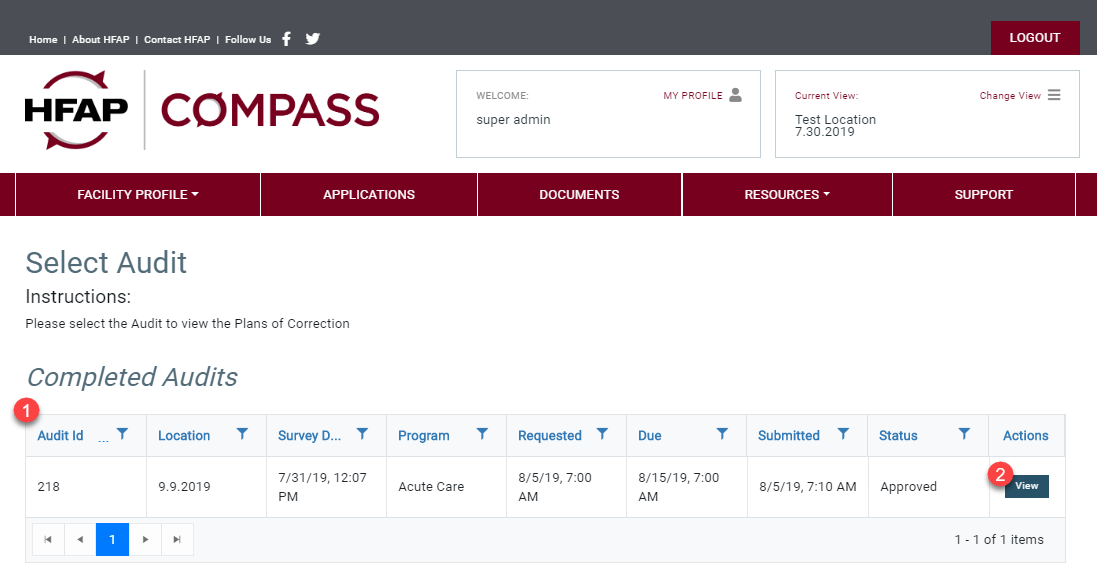
The Completed Audits page will display all completed audits for your facility and its locations. You will be able to select which completed audit you want to submit a plan of corrections for.
1. This table will display your completed audits and details including: audit ID number, location, survey date, program, date the plan of corrections was requested, the due date of the plan of corrections, the date the plan of corrections was submitted, and the status of the POC. This table will allow you to filter your completed audits by column.
2. The view button will take you to a list of deficiencies cited at that audit and allow you to complete your plan of corrections.
List of Deficiencies
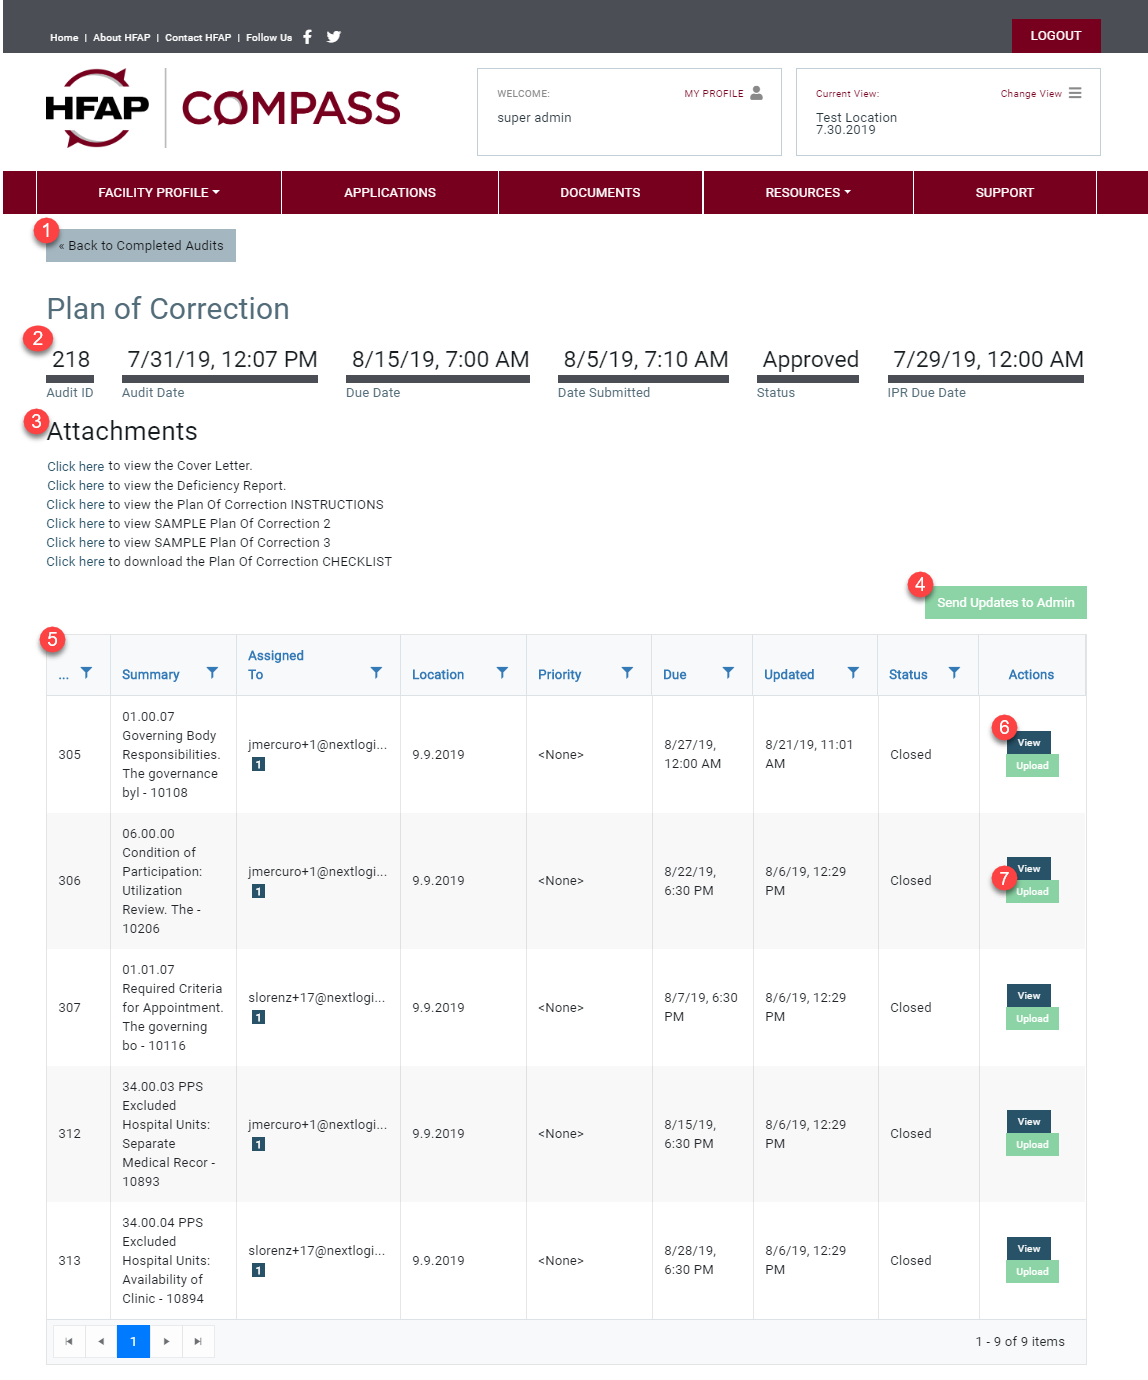
The List of Deficiencies page is where you will see a complete list of the deficiencies that were cited during your audit.
1. The Back to Completed Audits button will take you back to the completed audits dashboard without saving.
2. This section is where you will see a details regarding your audit. These details include: audit ID number, audit date, plan of corrections due date, date the plan of correction was submitted, status of the plan of correction, and it will show a due date if an interim progress report is needed.
3. The Attachment section is where you can view and download helpful documents. Documents include: your cover letter, your deficiency report, plan of corrections instructions, two sample plan of correction documents, and the plan of correction checklist.
4. Use the Send Updates to Admin button to submit your completed plan of corrections to HFAP for approval.
5. The Deficiencies grid will show a summary view of all deficiencies cited. This includes: deficiency ID number, summary of the standard, the user the deficiency is assigned to, location, priority, due date, date it was last updated, and the status.
6. The View button will take you to a more detailed view of that deficiency. This will be where you enter your plan of correction for that deficiency.
7. Use the Upload button to upload any attachments pertaining to a specific deficiency. Any documents uploaded here will also be viewable in the Document Repository under the POC section
Deficiency Overview
1. The Back to Plan of Correction button will take you back to the plan of correction deficiency dashboard without saving.
2. The Overview section will show detailed information regarding the location and the deficiency. Once a plan of correction has been submitted to HFAP, you will no longer be able to make changes.
3. The Save & Exit button will save current information and take you back to the completed audits dashboard.
4. The Next button will save current information and take you to the next section, corrective action.
Corrective Action
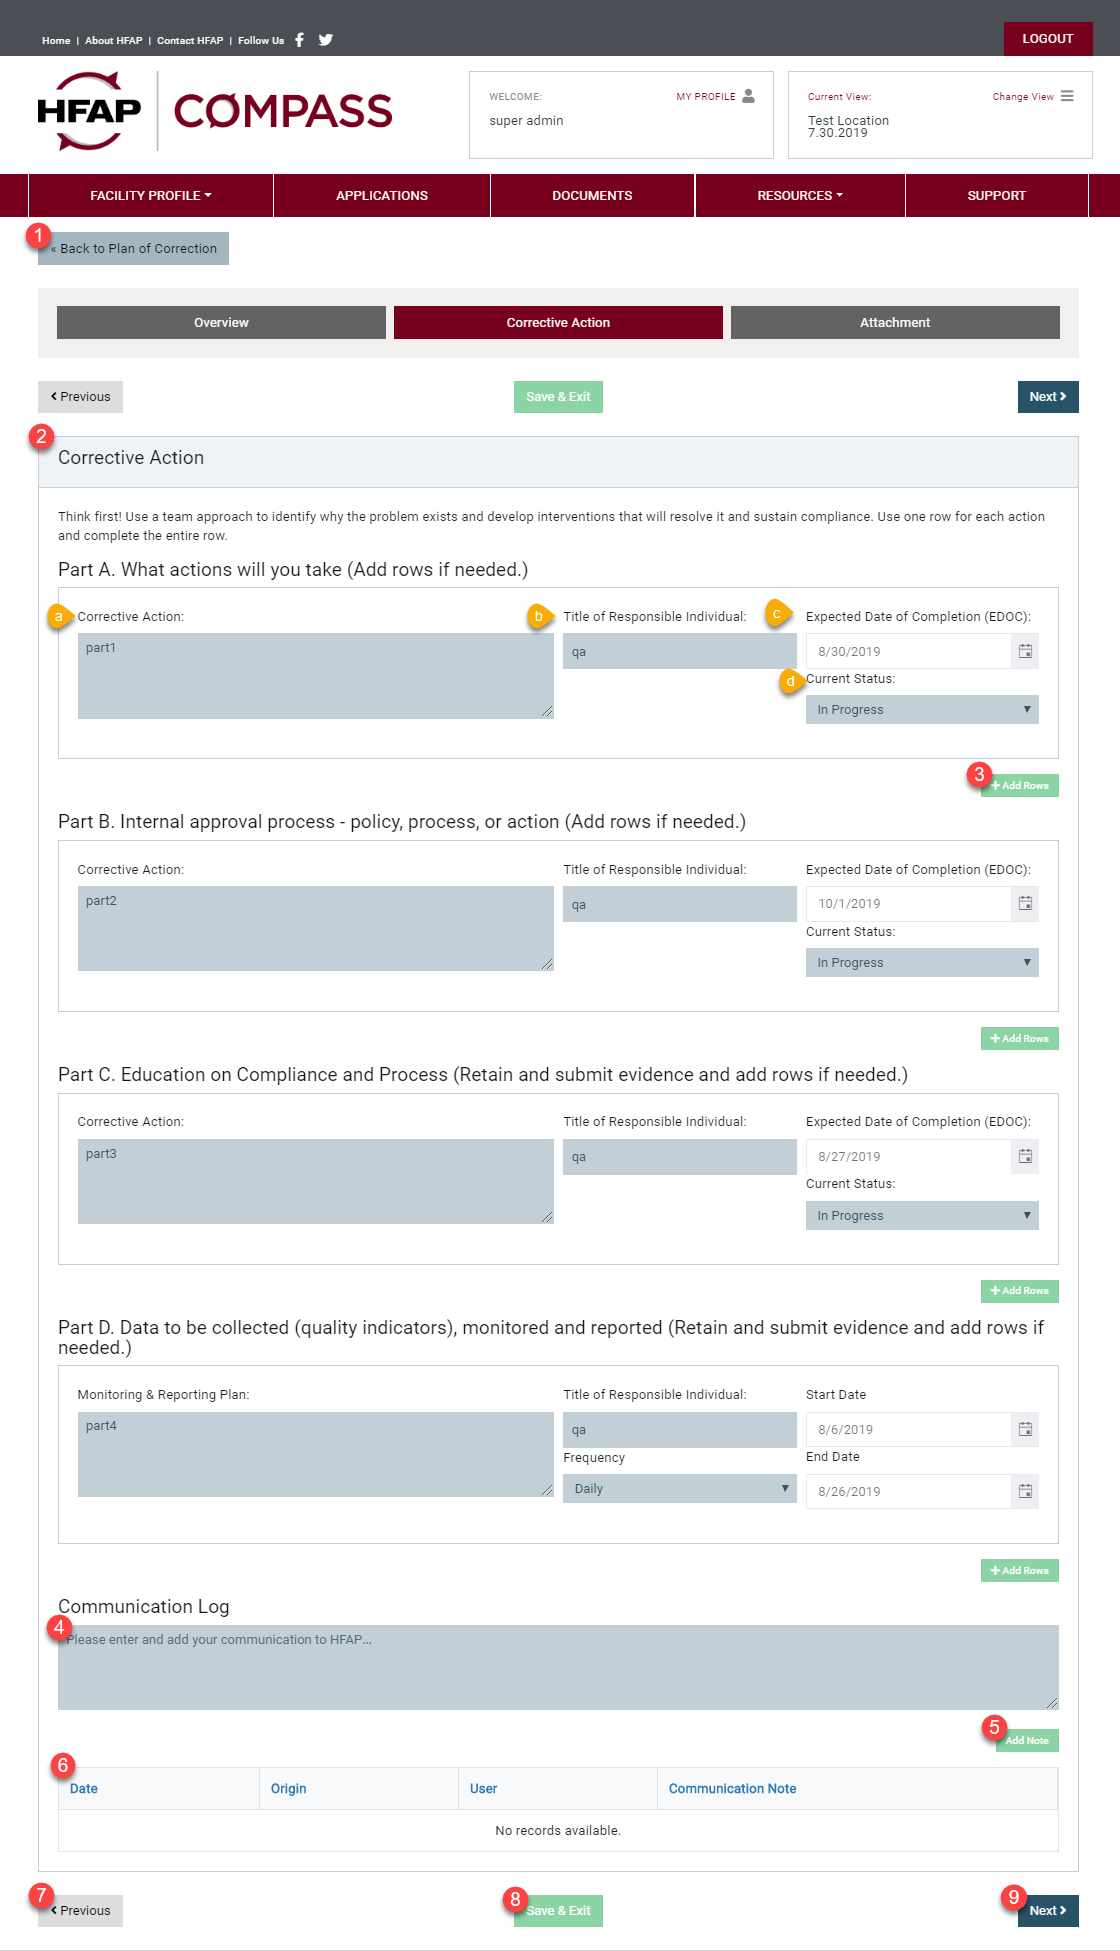
1. The Back to Plan of Correction button will take you back to the plan of correction deficiency dashboard without saving.
2. The Corrective Action section is where you will enter a detailed plan of how to correct the deficiency cited. There are four parts that must be completed per deficiency. Once a plan of correction has been submitted to HFAP, you will no longer be able to make changes.
a. The Corrective Action field is where you will give a detailed description of the corrective action your facility will be taking to fix the deficiency cited.
b. The Title of Responsible Individual field is where you will enter the title of the person responsible for this action.
c. The Expected Date of Completion is the date your facility will have this action done.
d. The Current Status drop down menu is where you select whether this action is still in progress, or has been completed.
3. The Add Rows button will allow you to add additional rows within each part. When clicked a duplicate row will appear where you can fill in the additional corrective action, title of responsible individual, expected date of completion, and current status.
4. The Communication Log is where you will communicate information regarding this deficiency to HFAP. HFAP will receive all communications entered in this log, and they can respond accordingly. Any communications from HFAP will be visible in the communication log table.
5. The Add Note button is used to submit your communication log to the table and to HFAP.
6. The Communication Log table will display detailed information regarding each communication. Details including: date the communication was entered, whether the communication was sent by the facility or by HFAP, user who entered the communication, and the communication note text.
7. The Previous button will save current information and take you to the previous section, overview.
8. The Save & Exit button will save current information and take you back to the completed audits dashboard.
9. The Next button will save current information and take you to the next section, corrective action.
Attachment
1. The Back to Plan of Correction button will take you back to the plan of correction deficiency dashboard without saving.
2. The Attachment section is where you can upload helpful documents to your plan of corrections. Any documents uploaded in this section will also be in the POC section of the document repository.
3. The Attached Files section will show all documents uploaded for this deficiency. Clicking on the file name will open the document.
4. The Upload button will open the document upload pop-up window.
5. The Previous button will save current information and take you back to the previous section, corrective action.
6. The Save & Exit button will save current information and take you back to the completed audits dashboard.


